Vegan Adventures and Chocolate Chip Cookies

Last weekend, I braved the chilly Saturday morning and attended a cooking demo at Native Foods Cafe. Native Foods Cafe is a vegan chain restaurant with locations in Chicago, Colorado, and California. You know it must be good when the restaurant is a chain with locations in multiple states! No limpy lettuce without dressing here-they have enticing menu items like “Super Italian Meatball Sub” and “Caribbean Jerk Chicken Salad.” My favorite is their “Rockin Moroccan Bowl” with their vegan chicken replacement because it’s hearty, flavorful, and I love sweet potatoes.

My first Rockin’ Moroccan bowl with tofu. I went back for bowl two with the fake chicken and devoured it before snapping a pic.


Native Foods Café is one of my favorite places to eat in the city because:

1.)

I think meat tastes funny. I’m convinced my mother’s traditional Chinese cooking method of including skin, bones, fat, gristle, etc caused my aversion to meat at an early age and I never grew out of it. I can’t eat meat when it actually looks like the animal.

2.)  I hate waiting for food. I’m here because I’m hungry and I want to eat now, thank you. No waiters or fancy prep at Native Foods and they make all their own tempeh, seitan, etc. 

The turnout at the demo was more than I expected. I had imagined a more intimate setting where we would actually participate in making the food. Instead, it was more like a presentation with samples, but hey, the samples were good and knocked my socks off!

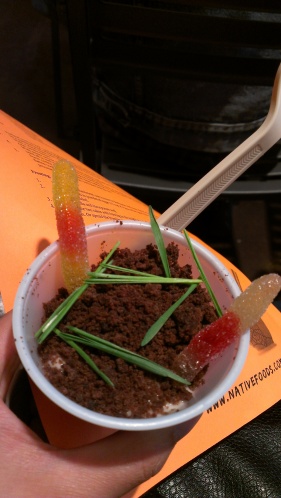
Of the four samples, my favorite was the vegan spin on dirt-in-a-cup.

Vegan dirt in a cup, complete with grass and worms.

Vegan dirt in a cup, complete with grass and worms.

Mhmmm…and it reminded me of another reason of why I love Native Foods Cafe so much.

3.) I can stuff my face and feel good about it. A diet devoid of animal products does not have to be bland and unfulfilling. Native Foods is incredibly creative in their approach at replicating and veganizing non-vegan foods. They even make their own vegan cheese! For those who are interested, you can find out more at http://www.nativefoods.com/

Feeling inspired from this demo, I am going to challenge myself and go vegan for a week along with my partner in crime. No dairy will be tough, but I am looking forward to getting creative with my meals and try out new and unconventional food combinations. I think breakfast will be tough because I love my yogurt and eggs. We shall see!

Before a week of adventurous eating, I decided to make something traditional from Baking Illustrated. I dare you to think of a more quintessential dessert/comfort food than chocolate chip cookies.

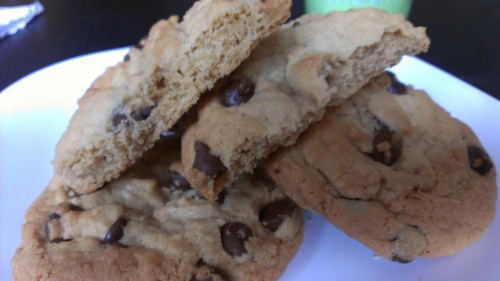
Please dunk me in milk.

Please dunk me in milk.

Thick and Chewy Chocolate Chip Cookies from Baking Illustrated.

2 cups plus 2 tablespoons (10 5/8 oz) unbleached all-purpose flour
1/2 tsp baking soda
1/2 tsp salt
12 tablespoons (1 1/2 sticks) unsalted butter, melted and cooled until warm
1 cup packed (7 ounces) light or dark brown sugar
1/2 cup (3 1/2) ounces granulated sugar
1 large egg plus 1 egg yolk
2 teaspoons vanilla extract
1-1 1/2 cups semisweet chocolate (I went with 1 1/2 cups)

1.) Whisk the flour, baking soda, and salt together in a medium bowl, set aside.

2.) Either by hand or with an electric mixer, mix the butter and sugars until thoroughly blended. Beat in the egg, yolk, and vanilla until combined. Add the dry ingredients and beat at low speed just until combined. Stir in the chips to taste.

3.) Roll a scant 1/4 cup of dough into a ball, hold the dough ball with fingertips of both hands and pull into 2 equal halves. Rotate the halves 90 degrees and, with the jagged surfaces facing up, join the halves together at their base, again forming a single ball. Place the formed dough ball on the prepared baking sheet, jagged surface up, spacing them 2 1/2 inches apart.

4.) In a preheated oven (325 degrees F), bake the cookies until light golden brown, about 15-18 minutes. Rotate the baking sheets from front to back halfway through baking time. Cool the cookies on the sheet, and then eat!

The extra yolk adds more fat without adding greasiness, keeping the cookies tender after cooling.
My breakfast.

My breakfast.

Verdict:

Baking Illustrated, you’ve done well!

True to their name, these cookies were thick and chewy. Perhaps I overbaked them a bit (I’m still getting used to my new oven), but I felt like they could have been softer/chewier after cooling. The flavor was wonderful and vanilla melded well with the faint melted butter taste. Overall, this is a great basic chocolate chip recipe. This recipe will be my go-to chocolate recipe and I can’t wait to experiment with browned butter and different mix-ins.

Stayed tuned next week for updates on my vegan challenge!

Nature’s First Green is Gold

Dear friends, I have no forsaken my vows to this blog. I’m back after vacationing in Peru where I hiked around, saw ancient ruins, and ate a lot of seafood, quinoa, and potatoes. Mhmm. My favorite part was camping in the mountains and falling asleep to the sound of running water and waking up to roosters. It’s refreshing to be so far removed from the city and a break in the every day routine.

Baby Alpaca!

Baby Alpaca!

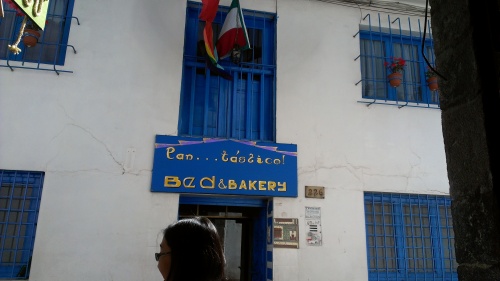
So punny.

So punny.

Lunch companions

Lunch companions

Macchu Pichu reminds me of human’s amazing potential. The ruins are an amazing feat of engineering and human labor. Our tour guide gave us a sensationalized version of the history behind Macchu Pichu. We were told that one rock was supposed to represent a guinea pig, but we overheard another tour guide saying the rock was meant to represent the mountains behind it. Meanwhile, we saw a tour group bending over, touching the rock, and looking at the ground. I can only imagine they’re stretching their sore hamstrings or looking to derive magical power from the rock. All in all, it was a fantastic trip and highly recommended!

image

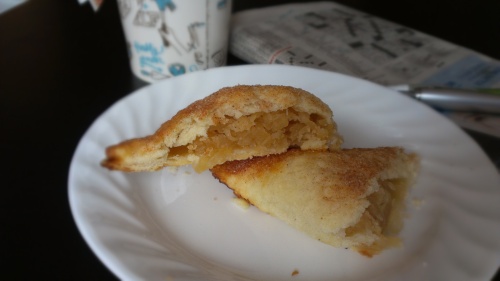
Seeing the trees starting to change color was a surprising welcome back to Chicago. I had lost track of time in Peru and didn’t realize the seasons would be changing when I got back. To me, fall is the season of apples and pumpkins. What better way to celebrate than make something with apples?

IMAG0700

Flaky Apple Turnovers and Quick Pastry Dough, adapted from Baker’s Illustrated

Makes 12
 

Quick Pastry Dough
1 cup unbleached all purpose flour
1.5 tablespoons sugar
1.5 tsp salt
1.5 cups cold unsalted butter, grated
9 tablespoons ice water
2 teaspoons lemon juice

1.)Mix the flour, sugar, and salt in a medium bowl. Add the grated butter and mix until the butter and flour come together into a coarse cornmeal consistency.
2.) Combine the ice water and lemon juice in a small bowl. Add half the liquid to the flour and butter, toss to combine. Keep adding liquid, 1 tablespoon at a time, until the dough will clump together in your hand. Turn the dough out onto a work surface. Lightly knead the dough with the heel of your hand until it comes together into a smooth ball. Wrap in plastic and refrigerate for one hour.

Apple filling:
4 large Granny Smith apples
1.5 cups sugar
3 teaspoons lemon juice
.5 teaspoon salt

Cinnamon Sugar
.5 cup sugar
2 teaspoons ground cinnamon

1.) Roll dough into a 20×15 inch rectangle, about 1/8th inch thick. Line 2 baking sheets with parchment paper, trim and cut the dough into twelve 5-inch squares, and place 5 on each sheet. Refrigerate the dough squares while making the filling.

2.)Peel the apples and grate them on the large holes of a box grater. Combine the grated apples, sugar, lemon juice, and salt in a medium bowl. Remove one sheet of dough squares from the refrigerator. Working with one square at a time, place a dough square on a work surface. Place 2 tablespoons of the grated apple filling (squeezed of excess fluid) in the center of the dough. Moisten two adjoining edges of the dough square with a finger dipped in the apple liquid, then fold the top portion of dough over the bottom, making sure to overlap the bottoms portion by 1/8 inch. Crimp the edges of the turnover with a fork. Repeat with remaining dough squares. Refrigerate the filled turnovers for at least 30 minutes, or cover with plastic wrap and refrigerate up to 24 hours.

3.) While the turnovers are chilling, preheat oven to 375 degrees. Combine the sugar and the cinnamon in a small bowl.

4.) Brush or mist the turnovers lightly with water and sprinkle them evenly with the cinnamon sugar. Bake until golden brown, 30-35 minutes, rotating the baking sheets front to back and top to bottom halfway through the baking time. Using a wide metal spatula, transfer the turnovers to a wire rack to cool. Serve warm or at room temperature.

IMAG0681

Buttercurls

Finished pastry dough

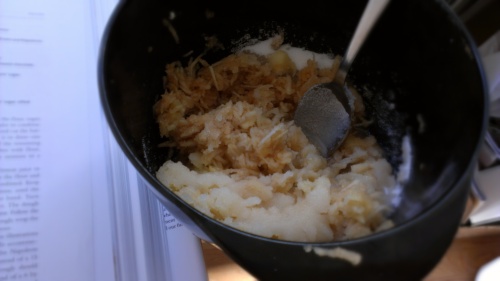
Apple filling

Apple filling

IMAG0691

Ta-da!

Ta-da!

Verdict:

Jaclyn Spitz: Deeee-licious.

I personally was not a fan of the grated apple texture. Perhaps it could grow on me, but I think I will keep looking for a different apple turnover recipe. Next time, Baker’s Illustrated!